


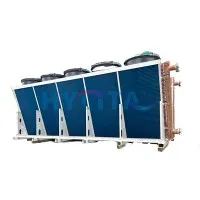
If you're in the HVAC or industrial process cooling space, you know cooling coils are the unsung heroes of keeping systems running smoothly-and keeping spaces (or products) from overheating. As a coil supplier, I talk to clients every week who ask the same question: "Why is my coil not performing like it should, and what's the fix?" 9 times out of 10, we end up talking about air velocity. It's not just a random number you pull off a spec sheet-getting it right can boost efficiency, cut energy costs, and extend your coil's lifespan. Get it wrong, and you're looking at reduced cooling capacity, higher wear, and even unnecessary downtime. Let's break down how to optimize air velocity for cooling coils, no overly complicated jargon, just what actually works in the field.

First, let's keep it simple: air velocity here is the speed of air moving across the cooling coil's surface, usually measured in feet per minute (fpm) for most applications. Too slow, and air hangs around the coil too long-this creates what's called "air side fouling" (think dust, lint, or moisture buildup), which acts like an insulator and blocks heat transfer. Too fast, and you hit turbulence, which reduces heat exchange efficiency, plus you might get "carryover" (when moisture from the coil's condensate pan gets blown downstream-bad for electronics or sensitive processes). The sweet spot? Usually between 400 and 600 fpm for standard applications, but it shifts based on your coil type, refrigerant or fluid used, and the environment.
Wait, not all coils are the same, right? I've seen clients grab a generic coil spec and apply it to a custom job, and that's where mistakes happen. For example, if you're running a heavy-duty process cooling system, you might need a shell and tube coil cooler-these are built for high-pressure, high-volume applications, and their optimal velocity is a bit different because they handle liquid on one side (not air, though air side velocity still matters for efficiency). Check out our shell and tube coil cooler page to see how we size these for specific velocity needs, so you don't over or underpower your airflow. Same goes for specialty coils: titanium coils, for instance, are used in corrosive environments (like swimming pools or chemical processing) and their material properties mean velocity can't be pushed as high-too fast, and you risk eroding the thin titanium surface. For that, our titanium coil resources lay out the recommended velocity ranges tailored to their durability limits. And stainless steel coil coolers, another workhorse, have a wider sweet spot but still need calibration based on their thickness and application load.
So how do you measure and adjust velocity without a fancy engineering degree? First step: audit your existing system. Grab a basic anemometer (you can get a decently accurate one for under $50 these days) and test airflow across the coil at multiple points. A lot of people just test near the fan, but airflow is rarely uniform-you might have dead spots (low velocity) where dust builds up, or hot spots (high velocity) that skip heat transfer. I once had a food processing client who was losing 12% efficiency because their ducting was leaking, making one side of their coil run at 700 fpm and the other at 300 fpm-no wonder their frozen food batches were inconsistently cooled. That audit is free (well, the anemometer is a one-time cost) and tells you exactly where to tweak.

Next, adjust your fan and ducting. Most systems have variable speed fans these days-use them! If velocity's too low, bump the fan speed up, but don't go past that 600 fpm sweet spot for standard coils. If velocity's too high, slow the fan down, but keep an eye on moisture buildup-slower air means more time for condensate to form, so make sure your condensate pan is clean and sloped correctly (clogged pans will back up, and that's a whole other headache). Duct dampers are another cheap fix: if one side of the coil has low velocity, close the damper on the opposite side to push more air over the underperforming area. We often work with clients on duct modifications for stainless steel coil coolers or shell and tube coil coolers to get airflow uniform, which is way more effective than just cranking the fan.
Another big factor: coil fin design. Wait, that's tied to velocity, right? Fins are what maximize the surface area for heat transfer, but if your air velocity is wrong, even the best fins won't work. For example, microchannel coils (super popular in modern HVAC) have smaller fins, so they're more sensitive to high velocity-too fast, and air bypasses the fins, leading to 15-20% lower cooling capacity. If you've got a microchannel coil, stick to 450-550 fpm, versus 500-600 for standard flat fins. And if you're dealing with a dusty environment (like a warehouse or construction site), lower velocity (400-450 fpm) is better to prevent that fouling I mentioned earlier-plus, it cuts down on how often you need to clean the coil. I always recommend titanium coils for these harsh dusty environments, because their corrosion resistance means cleaning doesn't wear them down, even with lower velocity.
Let's talk about a common mistake I see all the time: matching velocity to your load. If your system is only running at 50% capacity (like on a mild day for an office building), cranking the fan to get to 600 fpm is unnecessary. The coil doesn't need that much airflow, so you're wasting energy on a fan working harder than it needs to. Instead, adjust velocity to match the cooling load-use your building's thermostat or process controller to lower fan speed when demand is low. This is called "variable air volume" (VAV) and it's a game-changer for efficiency. One office client switched from fixed-speed fans to VAV, and their energy bill for cooling dropped by 18% in six months-all because they optimized velocity to match how much cooling they actually needed, not what the system was set to by default.
What about condenser coils specifically? Wait, that's a type of cooling coil too, right? Condenser coils reject heat from the refrigerant, so their air velocity is even more critical-if it's too low, the coil can't reject heat, making the refrigerant work harder, which raises compressor energy use. For condenser coils, the sweet spot is actually a bit lower: 400-500 fpm, because they get hot (120-150°F) and too fast air doesn't give enough time to carry that heat away. I had a restaurant client who kept tripping their compressor breaker every weekend-turns out their condenser coil's velocity was only 320 fpm because their fan was old and slow. We replaced the fan and adjusted velocity to 450 fpm, and the breaker stopped tripping entirely. That's a $300 fan fix saving them hundreds in repair bills.
Now, let's get into long-term optimization, not just quick fixes. Coil maintenance is tied directly to velocity. If you skip cleaning the coil, the fins get clogged, which effectively reduces the surface area the air hits, so velocity seems higher than it is (because the same amount of air is forced through a smaller space). I always tell clients to inspect their coils every 3 months for dust, lint, or mold-especially titanium coils in outdoor environments, which can get algae buildup that slows air flow. When you do clean, use a low-pressure air blower (not a pressure washer-too much pressure can bend fins, which messes with airflow distribution and velocity). Bent fins are a common issue, too-even a few bent fins can create dead spots that lower velocity in those areas, so straightening them with a fin comb (another cheap tool) goes a long way.
Another thing to consider: altitude. If you're working at high altitude (over 2,000 feet), air is thinner, so velocity measurements don't work the same as sea level. The air density is lower, so you need a higher velocity to get the same amount of heat transfer. For example, at 5,000 feet, you might need 600-700 fpm to match the performance of 500 fpm at sea level. That's a easy mistake to make if you're not accounting for location-we had a client in Denver who installed a standard stainless steel coil cooler spec'd for sea level, and it only cooled half as well until we adjusted the velocity to account for thin mountain air.
Wait, let's circle back to coil types because this is super important. If you're not using the right coil for your application, even perfect velocity won't help. For corrosive environments, a stainless steel coil cooler is a safe bet, but for extremely corrosive stuff like brine or saltwater, titanium coils are the way to go-we've seen titanium coils last 3x longer than stainless steel in those settings, because their higher strength and corrosion resistance let you operate at the ideal velocity without risking material degradation. And shell and tube coil coolers are for when you're dealing with liquid cooling (like in industrial processes) instead of air cooling-their internal liquid velocity is different, but the air side still needs to be optimized to keep the system running. All these coil types have specific velocity guidelines, so don't just use a one-size-fits-all approach.
Let's summarize the key steps so you don't get overwhelmed: first, audit your system with an anemometer to find actual velocity, not just what the spec sheet says. Second, adjust fan speed or ducting to get velocity in the sweet spot (usually 400-600 fpm, adjusted for coil type, altitude, and load). Third, keep your coil clean and fins straight to maintain uniform airflow. Fourth, match your coil to your environment-titanium for corrosive spots, shell and tube for heavy-duty liquid cooling, stainless steel for general industrial use. Fifth, use variable speed fans to adjust velocity as demand changes, so you're not wasting energy.
If you're not sure where to start, or you're troubleshooting a system that's underperforming, reach out-we help clients with velocity audits, coil selection, and adjustments all the time. Whether you need a titanium coil for a corrosive chemical plant, a shell and tube coil cooler for your manufacturing line, or a stainless steel coil cooler for your warehouse, we can work with you to get the airflow dialed in so your cooling system runs at peak efficiency. Don't let bad velocity kill your system's performance-small adjustments make a huge difference.
References:
- ASHRAE Handbook – HVAC Systems and Equipment, Airside Design and Coil Performance (2021)
- Thermal Fluids Analysis, Air Velocity Effects on Heat Exchanger Coil Efficiency, Journal of Industrial Cooling Systems (2019)
- Titanium and Stainless Steel Heat Exchanger Durability Guide, Material Science and Engineering Portal (2022)
- Variable Air Volume System Optimization, Energy Star Commercial Building Guidelines (2020)