


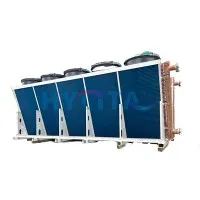
Hey there! As an air cooler supplier, I've seen firsthand how a properly installed air cooler can make a huge difference in your comfort, especially during those sweltering summer months. But here's the thing: installing an air cooler isn't just about getting the unit up and running. It's about setting it up in a way that maximizes cooling performance, reduces energy waste, and keeps your air cooler working at its best for years.
Why Air Cooler Efficiency Starts With Location
The first thing you need to do is choose the right location for your air cooler. But from an efficiency standpoint, location isn't just about convenience - it directly affects how hard your cooler unit has to work.
A well-ventilated area is essential. A window or doorway is usually a great choice because it allows the cooler to draw in fresh air and expel warm air more effectively. When air circulation is restricted, the unit struggles to cool, which means higher energy consumption and weaker results.
Make sure there's enough space around the cooler for proper air circulation. You don't want it to be cramped up against a wall or furniture. Also, try to place it away from direct sunlight as this can heat up the unit and reduce its efficiency. In short: the better the location, the less effort your air cooler needs to deliver the same cooling performance.
Tools and Materials That Support Better Cooling Performance
Before you start the air cooler installation, gather your tools and materials. You'll typically need a screwdriver (both flathead and Phillips), a drill (if you're mounting the cooler on the wall), a level, and a measuring tape.
But efficiency isn't only about tools. It's also about the quality of the components you install. As for the air cooler itself, it should come with all the necessary parts like the cooler unit, water tank, fan, and any mounting brackets. If you're looking for high-quality fins for your air cooler, we offer Stainless Steel Air Cooler Fins and Aluminum Air Cooler Fins that can significantly enhance the cooling performance.
Better fins mean better heat exchange, and better heat exchange means your air cooler reaches the desired temperature faster - using less power in the process.


Inspection: The First Step to Preventing Efficiency Loss
Once you've got everything ready, it's time to unbox and inspect the air cooler. Carefully remove all the parts from the box and lay them out. Check for any damage during shipping. Look for cracks in the body, bent fins, or loose components. If you find any issues, contact us right away as we'll be more than happy to help you out.
This step matters more than most people think. A bent fins issue or a loose components problem can quietly reduce airflow and cooling efficiency long before you notice it. Catching these problems early keeps your air cooler performing at its peak.
Assembly Choices That Directly Affect Cooling Efficiency
Most air cooler units come partially assembled, but you'll still need to do some final touches. Start by attach the wheels (if your cooler has them) to the base. Use the screwdriver to tighten the screws securely.
Next, install the water tank. Make sure it fits snugly into its designated slot. Some models may require you to connect hoses or tubes to the tank. Follow the instructions carefully to ensure a proper connection. A poorly connected water tank or hose can lead to water leakage, reduced cooling pads saturation, and lower efficiency.
Then, attach the fan and the cooling pads. The cooling pads are crucial as they help in cooling the air. Make sure they are properly aligned and secured. If the cooling pads aren't aligned correctly, air bypasses them instead of passing through the wet surface - and that's one of the most common reasons an air cooler underperforms.
Mounting: Stability Equals Efficiency
If you've decided to mount the air cooler on the wall, this step is for you. First, use the measuring tape and level to mark the spots on the wall where you'll drill the holes. Make sure the marks are straight and at the right height.
Drill the holes into the wall, and then insert the wall plugs. Attach the mounting brackets to the wall using the screws. Finally, lift the air cooler and secure it to the brackets. Double-check that it's level and firmly attached.
A level, stable mount isn't just about safety. It ensures the fan and water system operate smoothly, which reduces vibration, noise, and unnecessary wear and tear - all of which can drag down efficiency over time.
Power Supply: A Small Detail With a Big Impact
After the air cooler is assembled and mounted (if applicable), it's time to connect the power supply. Plug the cooler into a grounded electrical outlet. Make sure the power cord is not damaged or frayed.
If your air cooler has a remote control, you'll need to insert the batteries. Test the remote control to make sure it's working properly. A stable power connection helps the fan and water pump run at consistent speeds, which is essential for steady cooling performance.
Water Tank Setup: The Heart of Evaporative Cooling
Before you start using the air cooler, you need to fill the water tank. Use clean, cold water. Some air coolers have a water level indicator, so make sure not to overfill it.
Once the water tank is filled, turn on the air cooler. Let it run for a few minutes to allow the water to circulate through the system and soak the cooling pads. Fully saturated cooling pads deliver maximum cooling efficiency. If the cooling pads are dry or only partially wet, the air cooler is basically just a fan - and that's a waste of its potential.
Settings: Fine-Tuning for Maximum Efficiency
Most air coolers come with multiple settings for fan speed, cooling intensity, and oscillation. Start by setting the fan speed to a low setting and gradually increase it as needed. You can also adjust the settings and cooling intensity depending on how hot it is outside.
If your air cooler has an oscillation feature, turn it on to spread the cool air evenly throughout the room. Using the right settings for your space means you don't have to run the unit at maximum power all the time - and that directly improves energy efficiency.
Maintenance: Protecting Efficiency Over the Long Term
To keep your air cooler running smoothly, regular maintenance is essential. Follow these maintenance tips: clean the cooling pads every few weeks to remove dust and debris. You can do this by gently rinsing them with water.
Empty and refill the water tank regularly to prevent the growth of bacteria. Also, check the water pump and the fan for any signs of wear and tear. A clogged cooling pads or a worn water pump forces the unit to work harder for the same result.
If you're using the air cooler in a dusty environment, you may need to clean the exterior of the unit more often. Consistent maintenance is one of the easiest ways to keep air cooler efficiency high season after season.
Troubleshooting: Restoring Efficiency When Performance Drops
Sometimes, you may encounter some issues with your air cooler. If it's not cooling effectively, check if the cooling pads are dry or dirty. If they are, replace or clean them.
If the fan is making strange noises, it could be due to a loose components issue. Turn off the cooler and check for any loose screws or parts. Tighten them if necessary.
If you're still having problems, don't hesitate to reach out to us. We have a team of experts who can help you diagnose and solve the issue. Restoring proper airflow, water circulation, and component stability is often all it takes to bring efficiency back to normal.
Conclusion
Improving air cooler efficiency isn't as difficult as it may seem. By paying attention to location, assembly quality, water management, settings, and maintenance, you can have your air cooler running at its best in no time. And if you're in the market for a new air cooler or need replacement parts like Compressor Cooler, we're here to help.
Whether you're a residential customer looking to cool your home or a business owner in need of industrial-grade air coolers, we've got a wide range of products to meet your needs. If you're interested in purchasing an air cooler or have any questions about our products, feel free to contact us. We're always ready to assist you with your cooling needs and look forward to having a discussion about your procurement requirements.